Node.js Tutorial on Server-side Form Validation
How to Send an Email in Node.js using Nodemailer
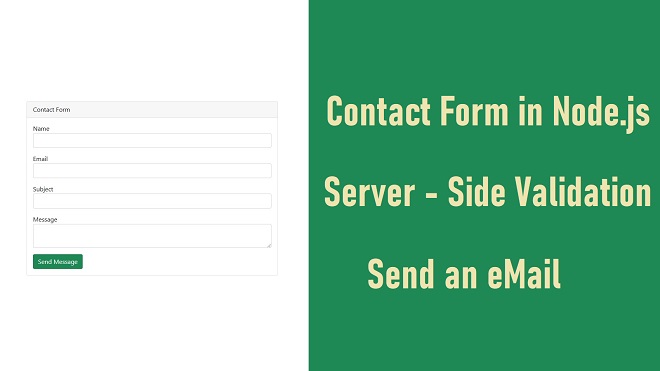
In this tutorial, we will learn how to make a contact form in Node.js and how to server-side validate form data and send an email from Node.js application.
To create a contact form in Node.js, we will be using the following technologies:
- Express: Express is a Node.js web application framework that provides a set of features for building web applications.
- Body-parser: Body-parser is a Node.js middleware that parses incoming request bodies in a middleware before your handlers, available under the req.body property.
- Express-validator: Express-validator is a set of express.js middlewares that wraps validator.js validator and sanitizer functions.
- Nodemailer: Nodemailer is a module for Node.js applications that allows you to send emails from your application.
Let's start by installing these dependencies using the following command:
npm install express body-parser express-validator nodemailer ejs
Next, create a file named app.js and add the following code:
const express = require('express');

const bodyParser = require('body-parser');

const { check, validationResult } = require('express-validator');

const nodemailer = require('nodemailer');

const ejs = require('ejs');

const app = express();

app.use(bodyParser.urlencoded({ extended: true }));

app.set('view engine', 'ejs');

//middleware for parsing JSON in request body
app.use(express.json());

app.get('/', (request, response) => {

	response.render('contact', { errors : '' });

});

app.post('/send',
	[
		check('name').notEmpty().withMessage('Name is required'),
		check('email').isEmail().withMessage('Invalid Email Address'),
		check('subject').notEmpty().withMessage('Subject is required'),
		check('message').notEmpty().withMessage('Message is required')
	], (request, response) => {

		const errors = validationResult(request);

		if(!errors.isEmpty())
		{
			response.render('contact', { errors : errors.mapped() });
		}
		else
		{
			const transporter = nodemailer.createTransport({
				service : 'Gmail',
				auth : {
					user : 'povonteblog@gmail.com',
					pass : 'write your Google App Password'
				}
			});

			const mail_option = {
				from : request.body.email,
				to : 'jm6078390@gmail.com',
				subject : request.body.subject,
				text : request.body.message
			};

			transporter.sendMail(mail_option, (error, info) => {
				if(error)
				{
					console.log(error);
				}
				else
				{
					response.redirect('/success');
				}
			});
		}
});

app.get('/success', (request, response) => {

	response.send('<h1>Your Message was Successfully Send!</h1>');

});

//start server
app.listen(3000, () => {

	console.log('Server started on port 3000');

});
Here, we have defined a GET route for rendering the contact form using ejs view engine. And, we have defined a POST route for processing the form data.
In the POST route, we have used express-validator to validate the form data. If there are any validation errors, we render the contact view with the error messages. Otherwise, we use nodemailer to send an email to the recipient email address.
Let's create a contact.ejs view file under the views folder with the following code:
<!DOCTYPE html>
<html>
<head>
    <meta charset="utf-8">
    <title>Node.js Server Side Validation</title>
    <link href="https://getbootstrap.com/docs/5.1/dist/css/bootstrap.min.css" rel="stylesheet" integrity="sha384-1BmE4kWBq78iYhFldvKuhfTAU6auU8tT94WrHftjDbrCEXSU1oBoqyl2QvZ6jIW3" crossorigin="anonymous">
</head>
<body>
    <div class="container mt-5 mb-5">
        <h1 class="text-warning text-center"><b>Node.js Tutorial - How to Send an Email</b></h1>
        <div class="col-md-6 mt-3 mb-3">
            <div class="card">
                <div class="card-header">Contact Form</div>
                <div class="card-body">

                    <form method="post" action="/send">
                        <div class="mb-3">
                            <label for="name">Name</label>
                            <input type="text" name="name" class="form-control" />
                            <% if(errors && errors.name) { %>
                            <span class="text-danger"><%= errors.name.msg %></span>
                            <% } %>
                        </div>
                        <div class="mb-3">
                            <label for="email">Email</label>
                            <input type="text" name="email" class="form-control" />
                            <% if (errors && errors.email) { %>
                            <span class="text-danger"><%= errors.email.msg %></span>
                            <% } %>
                        </div>
                        <div class="mb-3">
                            <label for="subject">Subject</label>
                            <input type="text" name="subject" class="form-control" />
                            <% if (errors && errors.subject) { %>
                            <span class="text-danger"><%= errors.subject.msg %></span>
                            <% } %>
                        </div>
                        <div class="mb-3">
                            <label for="message">Message</label>
                            <textarea name="message" class="form-control"></textarea>
                            <% if(errors && errors.message) { %>
                            <span class="text-danger"><%= errors.message.msg %></span>
                            <% } %>
                        </div>
                        <button type="submit" class="btn btn-success">Send Message</button>
                    </form>

                </div>
            </div>
        </div>
    </div>
</body>
</html>
In this view file, we have created a simple HTML form with fields for name, email, subject, and message. We have also used Bootstrap classes for styling the form.
We have also added a condition in the view to check if there are any validation errors. If there are any errors, we will display the error message next to the corresponding field.
Conclusion
In this tutorial, we learned how to create a contact form using Node.js in which we have cover how to validate the form data on the server-side. We used the Express.js framework and the Nodemailer package to send an email from the Node.js application.
Server-side validation of form data is essential to prevent invalid or malicious data from being submitted to the server. Nodemailer is a powerful package that can be used to send emails from Node.js applications.
With this knowledge, you can now create more complex forms and implement server-side validation for them and sending an email from Node.js Application.

0 comments:
Post a Comment